Create & Connect To A MongoDB Atlas Database With Node.js
In this guide, we'll walk through how to create a new MongoDB cloud database using Atlas and connect to it via a Node.js application.
MongoDB is a document-based and non-SQL database that is great for building modern applications. And Atlas will allow you to quickly get a database running in the cloud, will handle all the security and headache-inducing aspects of managing a database, and has a generous free-tier for you to use as well.
We'll first create the database via the Atlas website and then connect to it using a Node.js application. Also, we'll go over how to securely store your database username and password credentials in your application.
Before you begin, you'll need to have Node.js and NPM installed on your local development machine. We created an installation guide if you need help getting Node.js and NPM installed on your machine.
Let's get started!
Table Of Contents
- Create A MongoDB Database With Atlas
- Connect To The Database Using Node.js
- Store Database Credentials As Environment Variables
Create A MongoDB Database With Atlas
First, you'll need to log into the Atlas website or signup for a free account if you haven't already.
After you've successfully logged in or signed up, navigate to the create a cluster page if they didn't already redirect you there. The page should look similar to the image below.
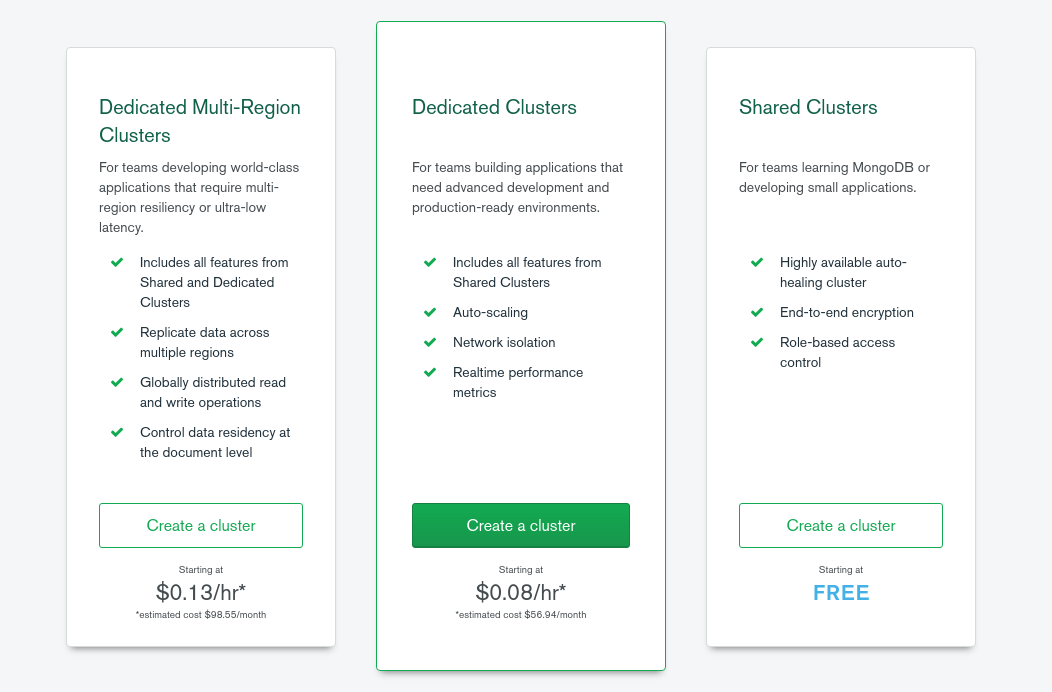
To begin with, choose the free cluster option. This will give you plenty of horsepower to start with.
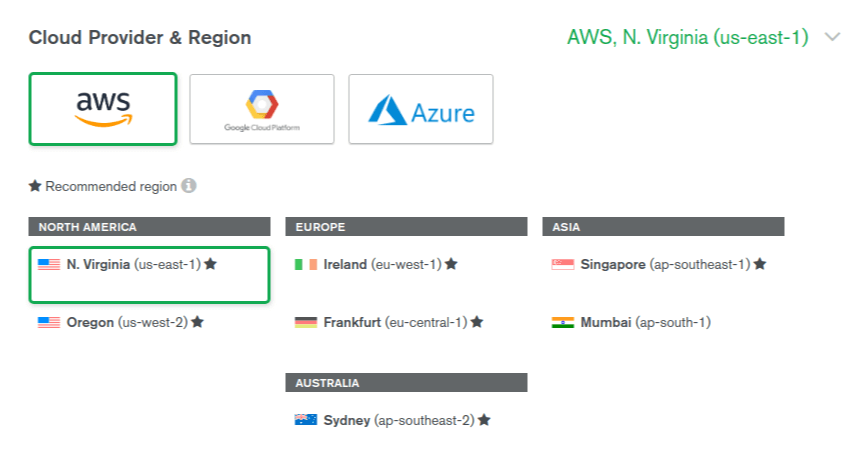
This will redirect you to a page where you can choose some configuration settings for the server your database will run on.
The first option is the cloud provider and region, which is the location of the server housing your database. Choose the option that is in the closest geographic proximity to where your visitors will be physically located. The closer a request is to the server, the faster it'll be fulfilled.
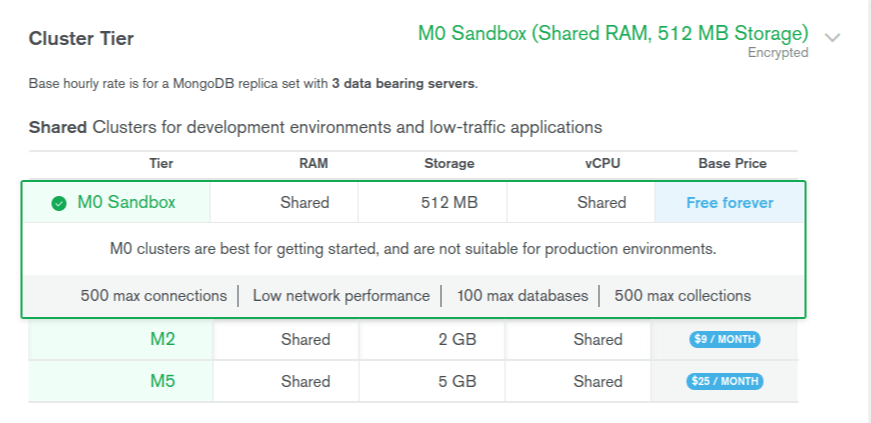
In the next section, you can choose from a set of cluster tiers with different storage and bandwidth capabilities. Ensure the free option is selected before proceeding.
After that, you can skip the Additional Settings section.
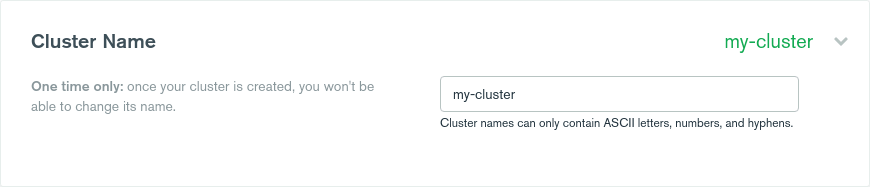
Last, give your cluster a name that will be displayed in your account control panel.
When you've gone through each section, hit the Create Cluster button to initiate the creation of your new database cluster.

It will take a few minutes for Atlas to create the cluster in their system. When the process finishes, you should see your new database cluster on a page that looks like below.
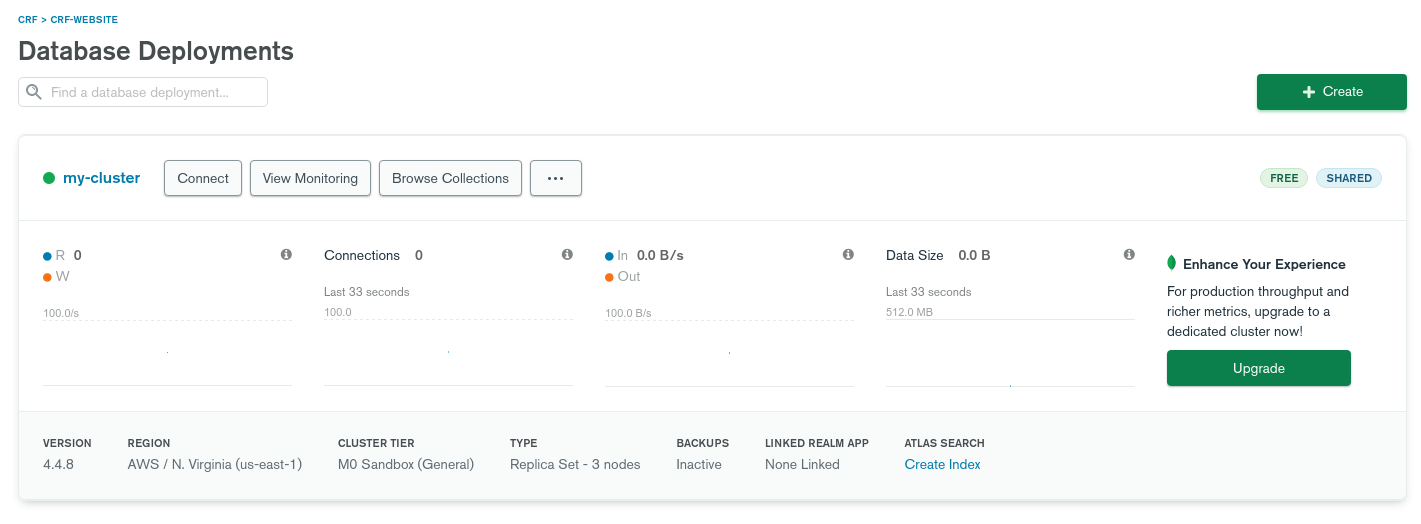
Before we can use the new database for anything, we need to first secure it by adding your IP address to the connection whitelist and then create a MongoDB username and password for the database.
Click on the Connect button in the cluster dashboard area. This will open a dialog box that will guide you through configuring some security settings for the database.
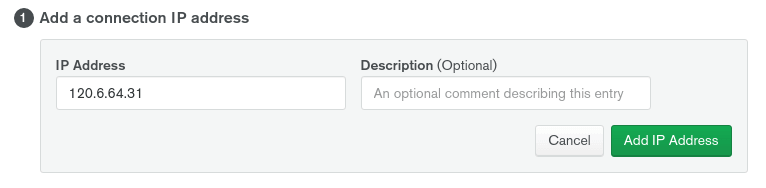
First, click on the Add Your Current IP Address button and verify that Atlas has populated the input field with the correct IP address matching your local development machine.

If it's correct, click the Add IP Address button to add your IP address to the whitelist. This will allow you to connect to the database when working on your local machine in development and production environments as well.
In the bottom section labeled Create a MongoDB User, enter a username and password for a new MongoDB database user. These are the credentials you'll use to read and write data to and from the database.
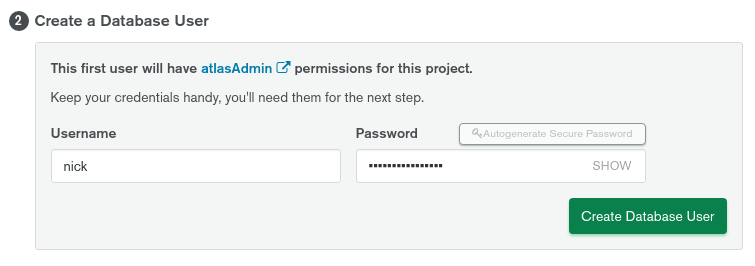
When you've added a username and password, click on the Create MongoDB User button to generate the new user.
With both the Whitelist a connection IP address and Create a MongoDB User sections complete, you can click the Choose a connection method button to move on to the next step.
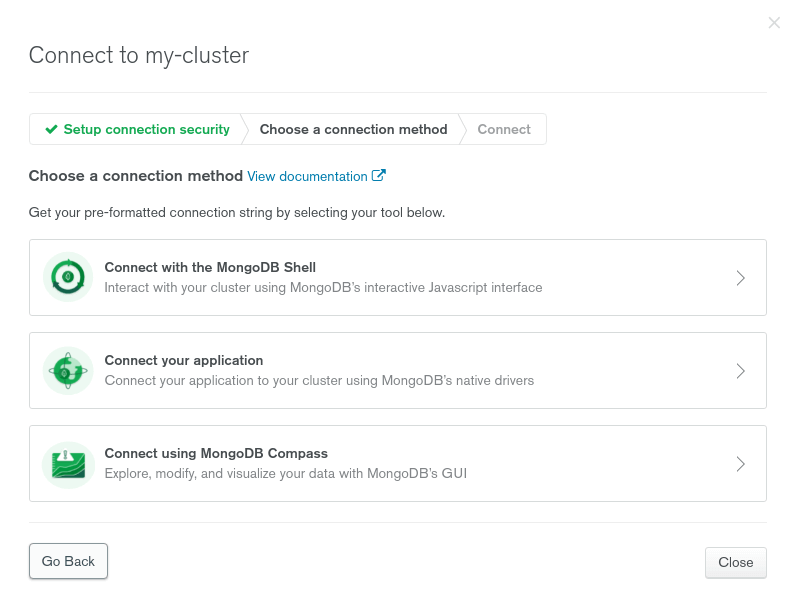
There are three different ways to connect to your new database, including the Mongo Shell, using a MongoDB native driver alongside your favorite programming language, and using MongoDB's GUI called Compass.
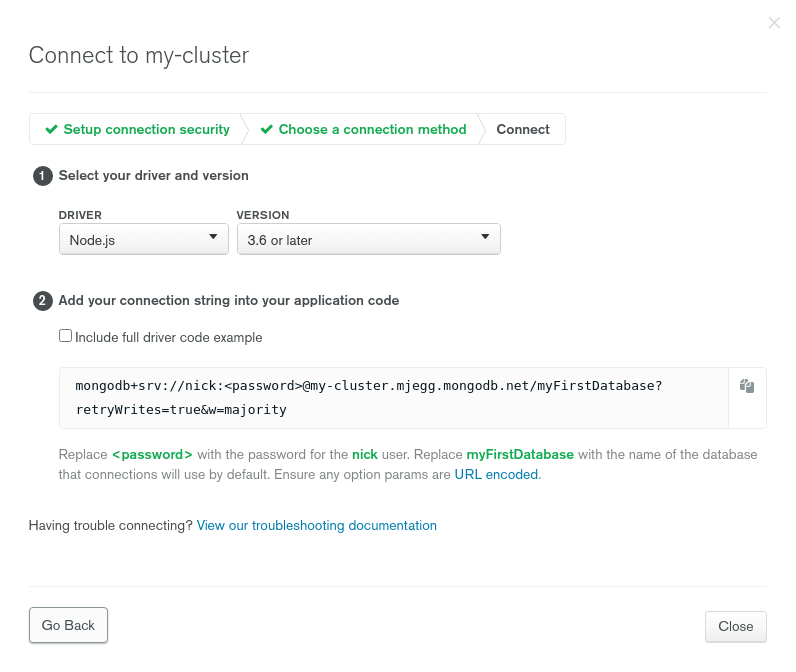
Since we'll be connecting to the database using Node.js, select the Connect your application option.
When you click on that option, a page will be displayed where Atlas generates a connection string you can copy and paste into your application.
Make sure Node.js is selected as the coding language driver. In the second section, a connection string should be generated for you.
Now you have a new MongoDB database created in the cloud using Atlas.
Since your cluster is now created, you can create a new database.
On the dashboard page for your cluster, click on the Collections button.
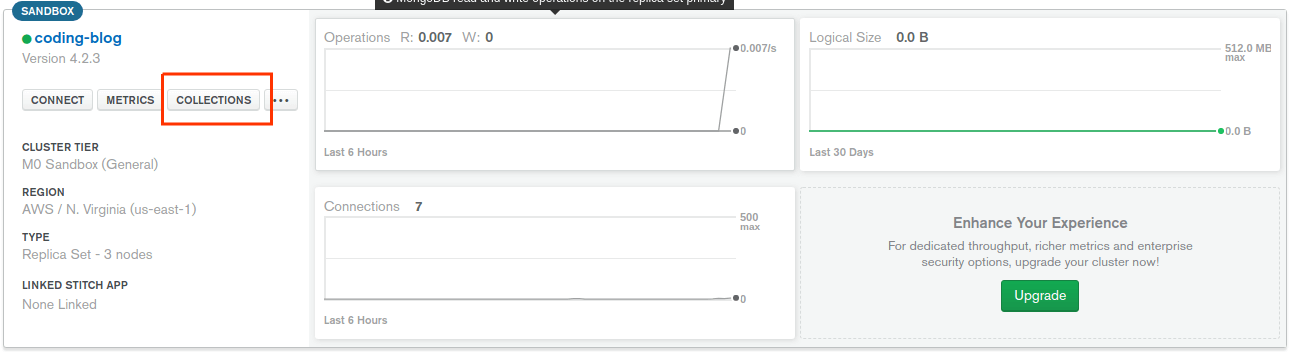
This will navigate you to the page where we can create a new database and collection.
On this page, click on the Add My Own Data button.
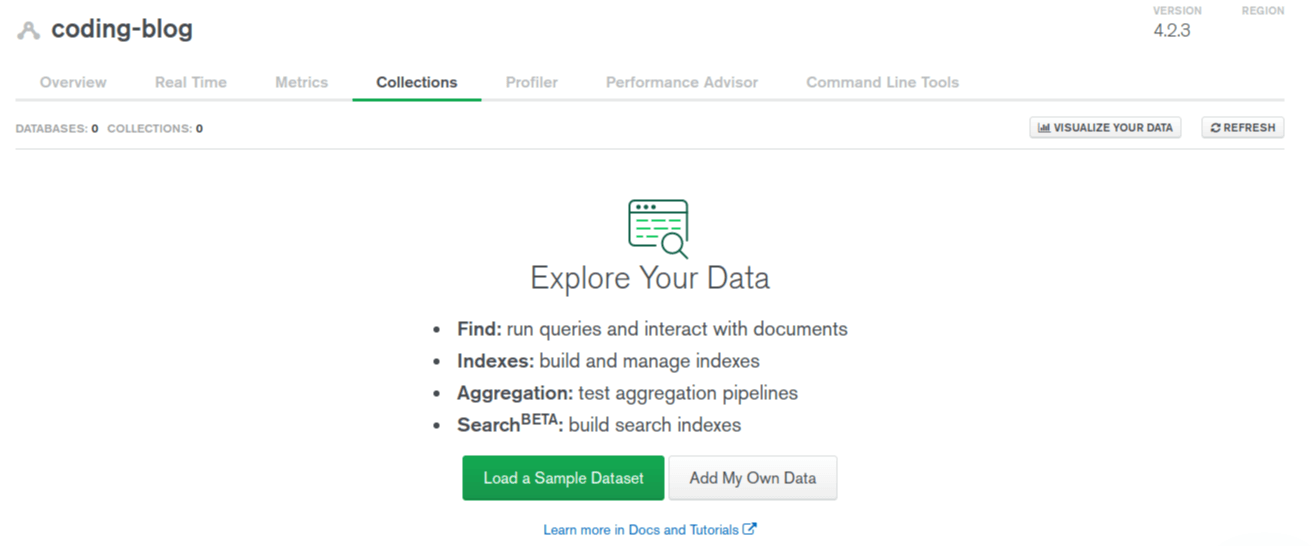
This will open a Create Database dialog box where you can enter a name for the new database and collection.
Enter your database and collection name into the form input fields.
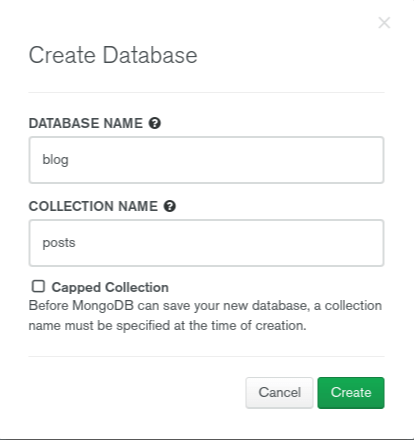
Hit the Create button when you're done.
On the next page, you should see your new database and collection displayed.
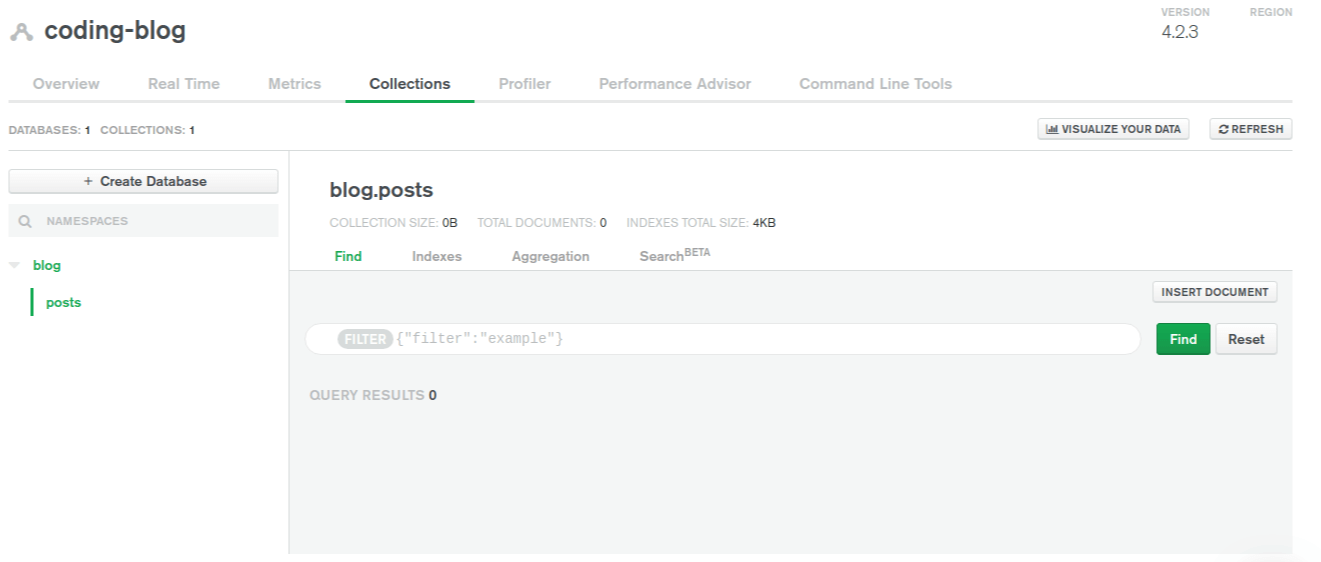
Now you have a new database created in your cluster! In the next section, we'll connect to it using Node.js.
Connect To The Database Using Node.js
Now that we have a MongoDB database created, we can connect to it using Node.js. We'll use the Mongoose NPM package for interacting with the MongoDB database.
First, you'll need to create a Node.js application if you don't already have one.
You can quickly do this by creating a new directory for your project (replace your-project with the name you want to use):
mkdir your-project
And cd into your new project directory:
cd your-project
Then, run the npm init -y command to create a package.json file and initiate a new Node.js application in the root of your project:
npm init -y
Now, you can create a new index.js file that will serve as the entry point for your application and where we'll add your code:
touch index.js
To connect and interact with your database, we'll use the mongoose NPM package.
You can install it to your project with this command:
npm install --save mongoose
When that's done installing, open the index.js file in your favorite code editor.
First, import the mongoose NPM package at the top of the file:
const mongoose = require("mongoose")
Now mongoose will be available for use throughout the file.
Make sure you have the connection string handy from the last section. It should look similar to this:
mongodb+srv://<username>:<password>@test.pxqht.mongodb.net/<dbname>?retryWrites=true&w=majority
Make sure you replace the username, password, and dbname items with the values you configured in the previous section.
Then, you can connect to your MongoDB database with this code (replace YOUR_CONNECTION_STRING with your connection string):
const mongoString = "YOUR_CONNECTION_STRING"

mongoose.connect(mongoString, {useNewUrlParser: true})

mongoose.connection.on("error", function(error) {
  console.log(error)
})

mongoose.connection.on("open", function() {
  console.log("Connected to MongoDB database.")
})
The mongoString variable stores the connection string to your MongoDB database. Make sure you use the connection string and username/password provided to you on the Atlas website.
The scheme for the connection string is as follows:
mongodb://[username:password@]host1[:port1][,...hostN[:portN]][/[defaultauthdb][?options]]
Here is a quick explanation for each item in the string:
mongodb://: a required prefix to identify that this is a string in the standard connection format.username:password@: authentication credentials.host[:port]: the host (and optional port number) where database instance is running./defaultauthdb: the authentication database to use if the connection string includes username:password@ authentication credentials. This is an optional item.?<options>: a query string that specifies connection specific options as<name>=<value>pairs. See Connection String Options for a full description of these options. This is an optional item.
Using that connection string, we connect to the MongoDB database using the mongoose.connect() method. We also add the additional option of useNewUrlParser to help avoid deprecation warnings that may arise.
Then, we added some code to listen for both any errors to occur and the successful connection to the database. We use the mongoose.connection.on() method to listen for those events. If an error occurs after the initial connection is made, we want to console.log() the error so we understand what happened. And we also want to log a success message when the application initially connects to the database.
Make sure you save the index.js file after making those changes.
For your reference, the entire index.js file should look like this:
const mongoose = require("mongoose")

const mongoString = "mongodb+srv://<username>:<password>@test.pxqht.mongodb.net/<dbname>?retryWrites=true&w=majority"

mongoose.connect(mongoString, {useNewUrlParser: true})

mongoose.connection.on("error", function(error) {
  console.log(error)
})

mongoose.connection.on("open", function() {
  console.log("Connected to MongoDB database.")
})
Now, we can start the application. If you don't have one already, you'll need to add a npm start script to your package.json file.
To do so, open your package.json file and add this JSON code to the "scripts" section:
"start": "node index.js"
Then, you can start your application with this command:
npm start
If the connection to your MongoDB database is successful, this output should show in your terminal:
Connected to MongoDB database.
If you run into errors, verify that the code matches what was provided above and that your connection string username and password credentials match what you created on the Atlas website dashboard.
If everything went as planned, you should now be connected to your MongoDB Atlas cloud database!
In the next section, we'll go over a way to store your database credentials in a more secure location using a .env file.
Store Database Credentials As Environment Variables
An additional thing you'll want to do is create a .env file for your application and use it to store your database username and password.
When you use source control software and/or deploy your application to production, you'll want to exclude your credentials from being visible when taking those actions.
For instance, if you push your code to GitHub (or GitLab), you can add a .env declaration to your .gitignore file to exclude your credentials from being pushed with your code. This process will greatly limit the chance of your credentials being accidentally revealed to others by controlling what environments they show up in (i.e. only on your local development or production server machines).
To do this, you'll need to first create a .env file in the root of your project directory:
touch .env
Then, open that file in your coding editor and add these two environment variables to it:
DB_USERNAME=username
DB_PASSWORD=password
Make sure you add your actual credentials for both the DB_USERNAME and DB_PASSWORD variables. And then save the file.
Now we need a way to load the variables from the .env file into your Node.js application so you can access them via process.env.DB_USERNAME and process.env.DB_PASSWORD in your code.
To make this easy, we'll use the Dotenv NPM package to facilitate the loading and use of .env variables.
You can install it with this command:
npm install --save dotenv
To get this working in your code, you'll need to both require() the NPM package into the index.js file and use the dotenv.config() method to initiate the package.
First, require() the dotenv NPM package at the top of your index.js file:
const dotenv = require("dotenv")
And then add the dotenv.config() method below where you required the mongoose and dotenv NPM packages:
dotenv.config()
Now you need to update your mongoString value to incorporate the environment variables available via the process.env object.
To do this, update your mongoString variable value to this:
const mongoString = `mongodb+srv://${process.env.DB_USERNAME}:${process.env.DB_PASSWORD}@coding-blog-t0xf0.mongodb.net/<dbname>?retryWrites=true&w=majority`
We replaced the username and password in your MongoDB connection string with the process.env.DB_USERNAME and process.env.DB_PASSWORD variables stored in the .env file. We use the ES6 template literal string to embed the variables directly into the string.
When you're done making edits to the file, it should look something like this:
const mongoose = require("mongoose")
const dotenv = require("dotenv")

dotenv.config()

const mongoString = `mongodb+srv://${process.env.DB_USERNAME}:${process.env.DB_PASSWORD}@test.pxqht.mongodb.net/<dbname>?retryWrites=true&w=majority`

mongoose.connect(mongoString, {useNewUrlParser: true})

mongoose.connection.on("error", function(error) {
  console.log(error)
})

mongoose.connection.on("open", function() {
  console.log("Connected to MongoDB database.")
})
Save the file when your done editing and start your application again:
npm start
You should successfully connect to your database and receive this output:
Connected to MongoDB database.
That was the last step in this guide.